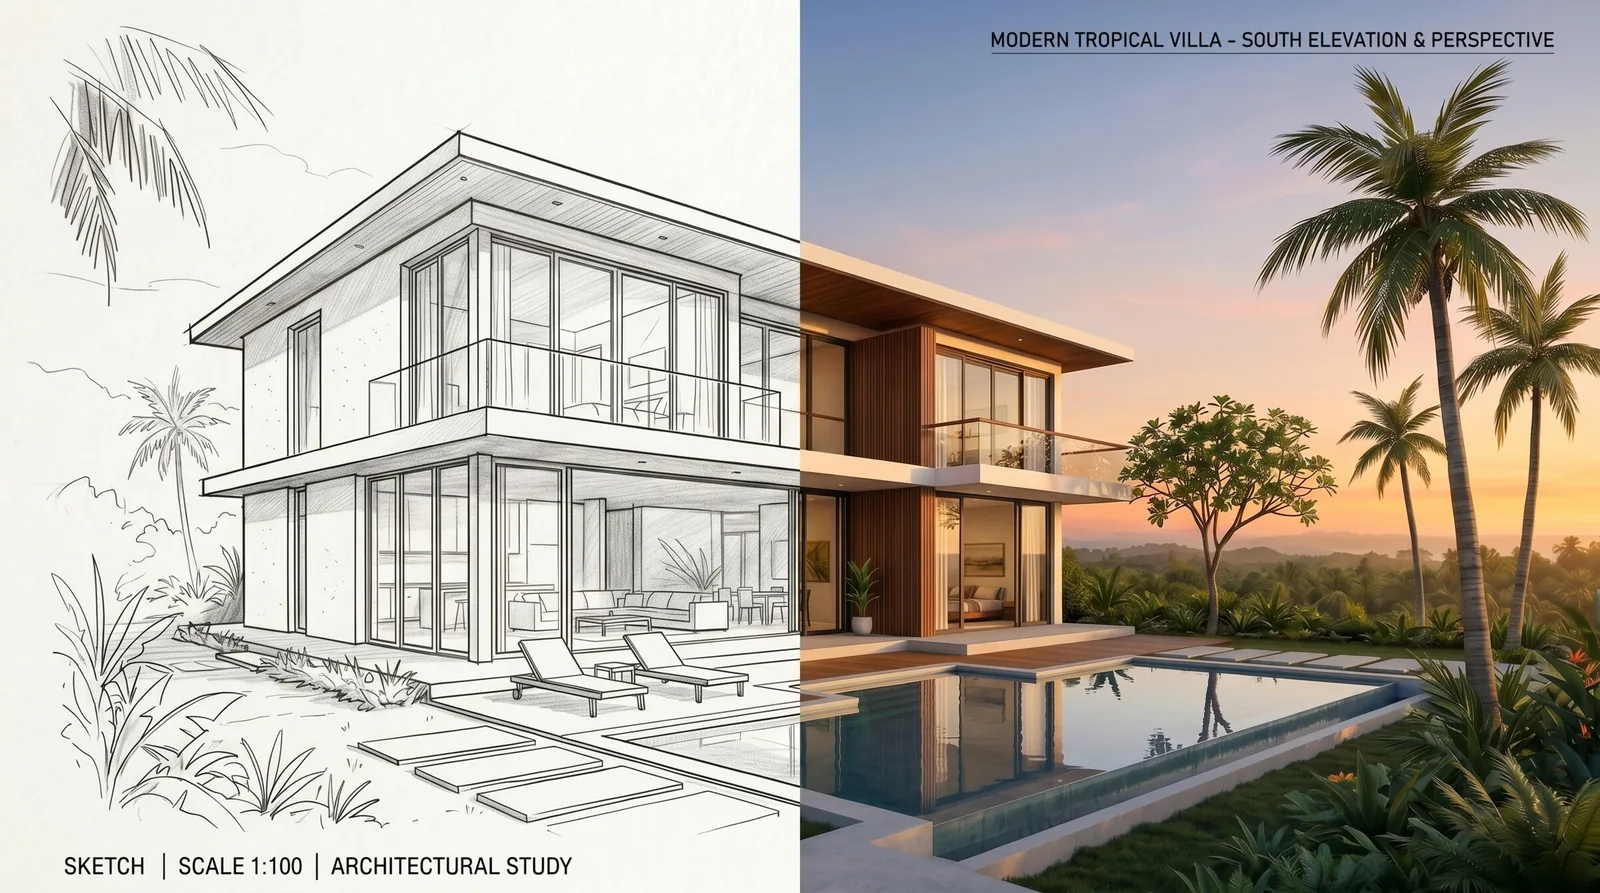
If you design in SketchUp, you already know the gap. The model is finished, the geometry is clean, the client is waiting — and then comes the render. Traditionally that means exporting to V-Ray or Enscape, chasing materials, tuning lights, waiting on a render farm, and praying the final frame doesn't come back muddy at 2 a.m.
In 2026 there is a faster path. AI rendering reads your SketchUp export as a geometry reference and reinterprets it as a photorealistic building — real materials, real sunlight, real environment — in under a minute. This guide walks through the full workflow, the pitfalls, and how to keep your design intent intact.
Why SketchUp models are hard to render the traditional way
SketchUp is loved because it is fast to model in. That same speed is why its native output looks like a 3D model rather than a photograph: flat faces, default materials, hard edges, and the unmistakable "SketchUp look." To escape it with a classic renderer you need three things most architects don't enjoy spending time on:
- A material library and the patience to assign, scale, and tweak every surface.
- A lighting setup — sun position, HDRIs, artificial lights, exposure.
- Render time and hardware — a capable GPU or a paid cloud farm, plus iteration cycles that eat hours.
Each of those is a place the render can go wrong. AI rendering removes all three by treating the export as what the building should be shaped like rather than how it should be lit and surfaced.
The core idea: geometry in, photograph out
The mental shift is important. A traditional renderer respects your model literally — every material and light you set is what you get. An AI renderer respects your massing, proportions, and layout, then re-imagines the surfaces and lighting as a real-world photograph.
That is exactly why a "this is a 3D model" flag matters. When the AI knows the input is a CAD export and not a photo, it stops preserving the isometric, line-art, studio-background aesthetic and instead renders a grounded, photographic building. Skip that signal and the model's "3D look" leaks into the result.
Step-by-step: from SketchUp to a finished render
1. Clean the model before you export
You don't need perfect materials, but you do need honest geometry. Before exporting:
- Hide construction guides, section cuts, and stray edges.
- Make sure the massing reads clearly — walls, roof, openings, and terrain.
- Pick a camera angle that tells the story: eye-level for street presence, a 3/4 corner view for volume, an elevated angle for context.
A clean, well-framed export gives the AI unambiguous geometry to work from, which is the single biggest lever on output quality.
2. Export a clean image
Export a JPG or PNG from your chosen viewport. A crisp export at a reasonable resolution (roughly 1500–2500 px on the long edge) is ideal — big enough to carry detail, small enough to upload quickly. Avoid heavy sketchy edge styles; a clean hidden-line or shaded style reads best.
3. Upload and flag it as a 3D model
Upload the export and, critically, mark it as a 3D model or drawing. This tells the engine to use the image only for building geometry, layout, proportions, and volume — then fully re-render it as a photorealistic building with real concrete, wood, glass, and stone, real sun and shadows, and a real environment. Without this flag, AI engines tend to "respect" the input too much and keep the CAD aesthetic.
4. Write a prompt that adds what geometry can't
Geometry tells the AI the shape. Your prompt tells it the story. Strong render prompts describe four things:
- Style & materials — "concrete and dark timber, floor-to-ceiling glass, stone plinth."
- Lighting & time of day — "warm golden-hour sun, long shadows, soft haze."
- Environment & context — "surrounded by tropical planting, infinity pool in the foreground."
- Mood — "calm, premium, editorial."
The more specific the prompt, the more the render feels like an intentional photograph rather than a generic guess.
5. Generate, then refine
Generate your first render. If 90% is right but one thing is off — the light is too flat, you want a pool added, the facade should be white stone instead of brick — refine it with a short instruction rather than starting over. Aspect ratio, camera, and overall style are preserved; you only change what you describe.
Prompt patterns that work for SketchUp exports
Here are reliable prompt skeletons you can adapt:
Exterior, tropical villa
"Modern tropical villa, concrete and dark wood, floor-to-ceiling glazing, surrounded by palms, golden-hour light, infinity pool in front, calm editorial mood."
Urban infill, daytime
"Contemporary townhouse, white render and oak accents, clear midday light, mature street trees, pedestrians for scale, natural photographic perspective."
Elevated context shot
"Aerial three-quarter view, hillside site, terraced landscaping, late-afternoon sun, realistic surrounding vegetation and neighboring plots."
Notice that none of these mention "SketchUp" or "render" — they describe the finished photograph you want.
Common mistakes (and how to avoid them)
- Forgetting the 3D-model flag. The number-one cause of "it kept the isometric look." Always flag CAD exports.
- Over-busy exports. Section fills, dimension lines, and sketchy edges confuse the geometry read. Export clean.
- Vague prompts. "Make it nice" produces generic results. Name materials, light, and environment.
- Fighting the model when you should refine. If the base is good, refine in one sentence instead of regenerating from zero.
- Wrong camera in SketchUp. The AI keeps your framing. A weak angle in, a weak angle out — set the shot before you export.
How this compares to V-Ray and Enscape
Traditional GPU renderers still win when you need exact material accuracy — a specific product finish signed off by a manufacturer, for example. But for the 90% of cases where an architect needs a convincing, beautiful, on-brief image to move a project forward, AI rendering is dramatically faster:
| Traditional (V-Ray / Enscape) | AI rendering | |
|---|---|---|
| Setup | Materials + lights + camera | Upload + prompt |
| Time to first image | 30 min – several hours | ~60 seconds |
| Hardware | Strong GPU or farm | Any browser |
| Iteration cost | High (re-render) | Low (refine in a sentence) |
| Material precision | Exact | Interpretive |
For concept design, client buy-in, competition boards, and social content, the trade-off is overwhelmingly in AI's favor. For final construction-grade product visualization, a hybrid approach — AI for exploration, traditional for the final hero — is common.
Where to go next
Once your SketchUp-to-render workflow is smooth, the same approach extends naturally: floor plans to 3D exteriors, empty plots to placed villas, and interiors from bare shells. If interiors are your focus, read our AI interior design guide. If you're weighing platforms, see our 2026 AI rendering tools comparison.
The takeaway: your SketchUp model is already the hard part. In 2026, turning it into a photorealistic image is the fast part — a clean export, the 3D-model flag, a specific prompt, and a minute of patience.